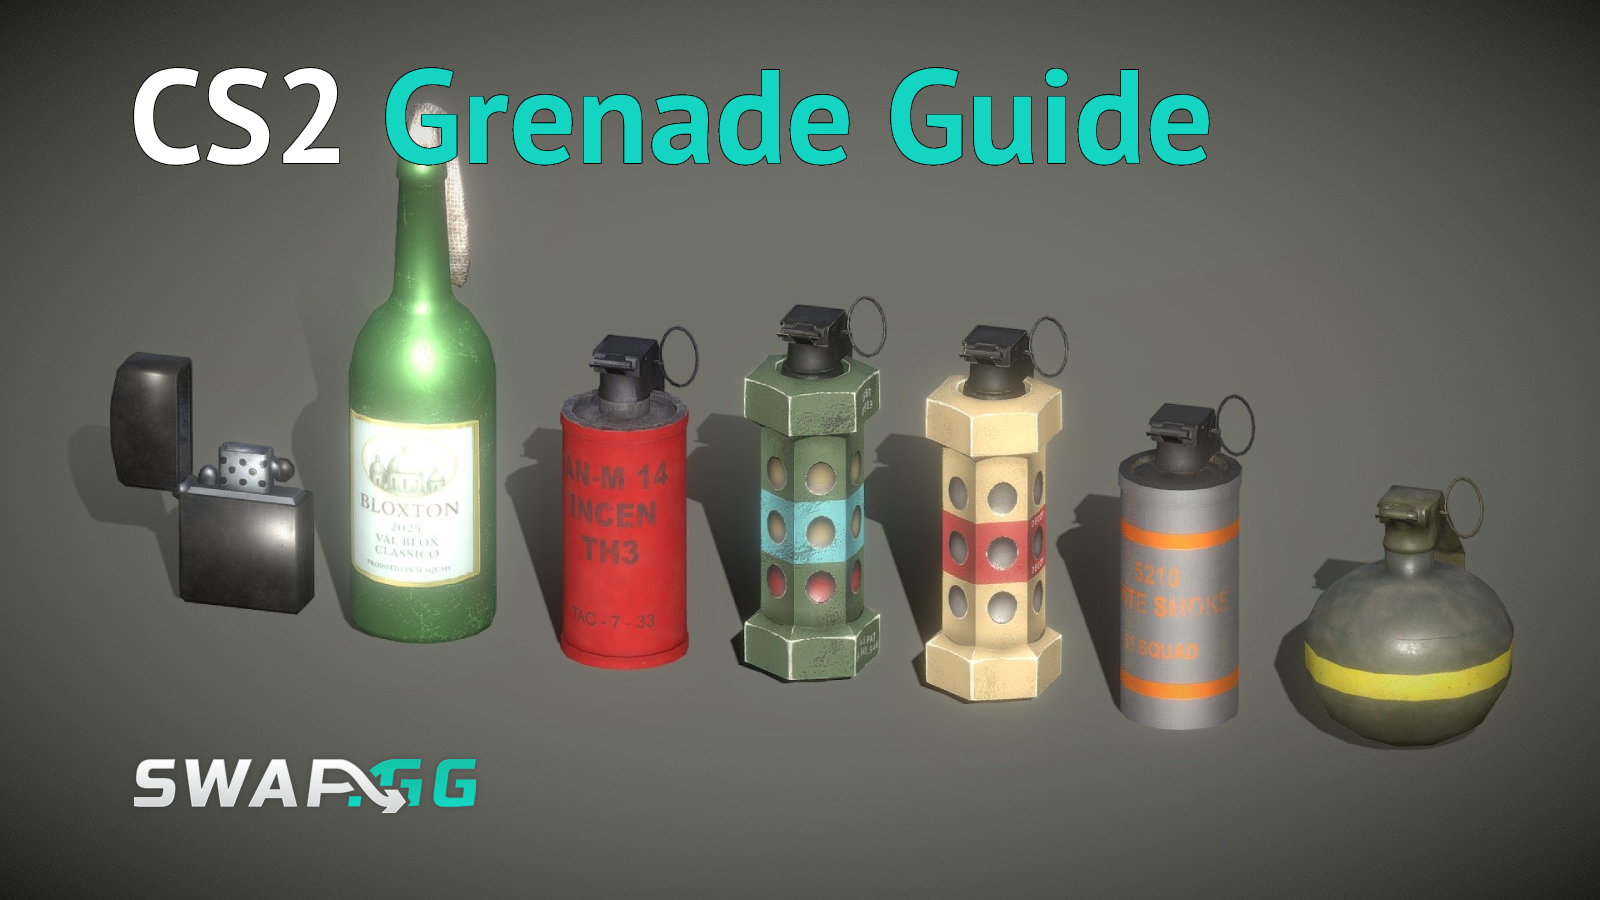
How to Set Up Autoexec in CS2 Like a Pro

Diposting pada di CS2
One of the nightmare scenarios for each CS2 player is launching a competitive game and realizing that all the perfect crosshair, grenade binds, and other important settings are gone. Luckily, there is an easy solution to prevent this from ever happening - autoexec.cfg file. This script is basically your personal settings butler, which will automatically load your configuration each time you start CS2. Regardless of your skill level, one of the must-haves in CS2 is autoexec, and today we are going to show you how to set up autoexec in CS2.
What Exactly is an Autoexec in Counter-Strike 2?
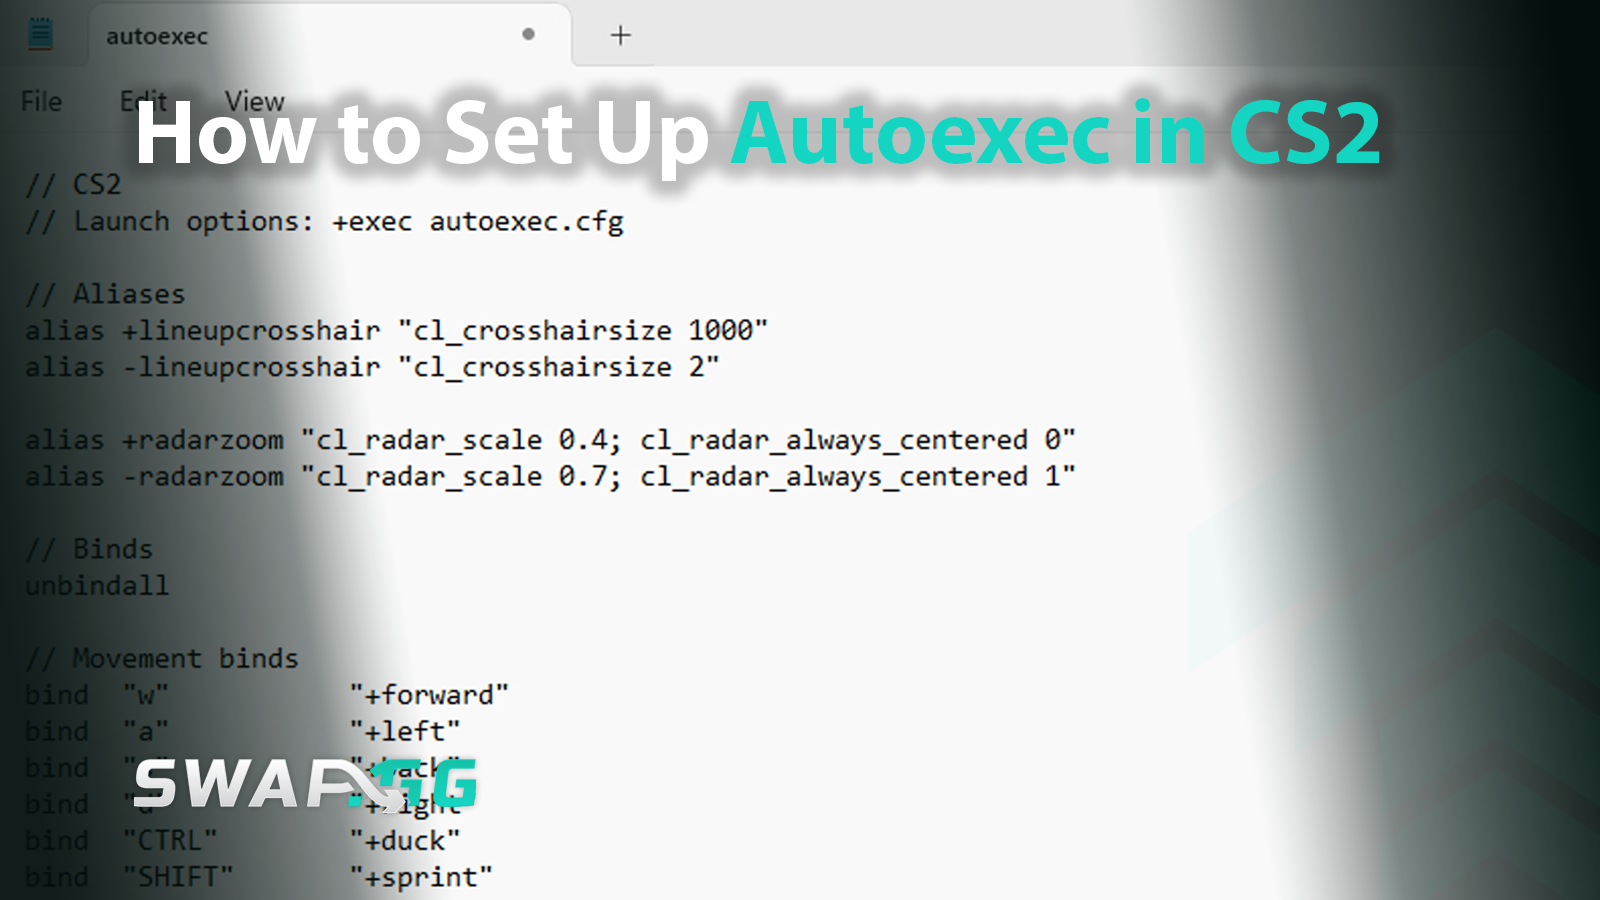
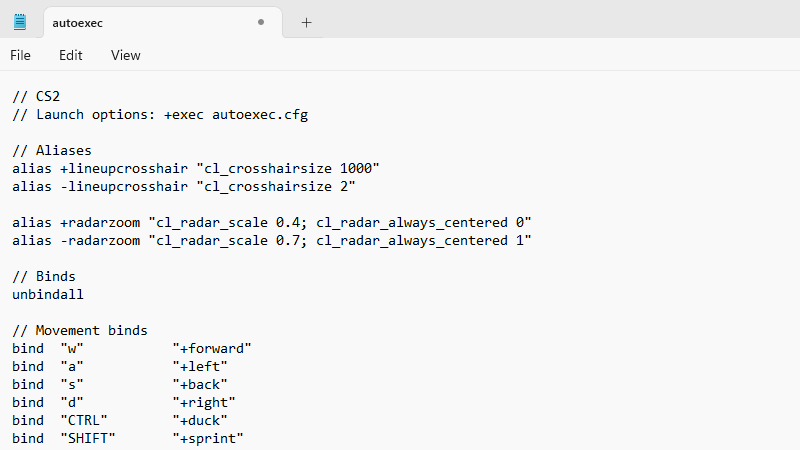
In its simplest form, an autoexec (also sometimes called auto-execute) is simply a plain text file called autoexec.cfg and stored in your CS2 game folders, with a list of console commands in it that are automatically read and executed by the game every time it is loaded. This file is vital toward having the guaranteed consistency, as it ensures that key settings such as crosshair, sensitivity, viewmodel, audio levels, and key binds are loaded the exact same way each time, regardless of game updates, Steam Cloud corruption, or other factors.
It is also time-saving, as the dots of commands to be entered manually after any launch or refresh are removed. In addition to convenience, autoexecs also allow more sophisticated customization not accessible within the in-game menus, including navigating multiple-key grenade binds, coordinating jump-throws, or specific network settings. To competitive players, it offers a stable and customized environment in which they can concentrate solely on the game and strategy.
Crafting Your Autoexec File: A Step-by-Step Walkthrough
Setting up your autoexec is straightforward. Follow these steps carefully:
Step 1: Create the File
- Open Notepad (or your preferred text editor).
- Save the file as autoexec.cfg:
- Navigate to File > Save As in Notepad.
- Set the "File name" to autoexec.cfg.
- Change the "Save as type" dropdown to "All Files (.)".
- Save it in this folder:Steam\steamapps\common\Counter-Strike Global Offensive\game\csgo\cfg.
Step 2: Add Your Commands
Open autoexec.cfg and input your desired console commands, one command per line. For example:
volume 0.8
sensitivity 1.2
cl_crosshairstyle 4
// My grenade bind for Flashbang
bind "f" "use weapon_flashbang"
Use // to add comments (ignored by CS2) for clarity.
Step 3: Enable Autoexec Execution via Steam
- Open your Steam Library.
- Right-click "Counter-Strike 2" and select Properties.
- In the "General" tab, add this to the Launch Options field:+exec autoexec.cfg
Note: In many cases, CS2 automatically runs your autoexec.cfg if it’s placed in the correct folder, even without adding the +exec autoexec.cfg launch option. However, adding this launch option is a good practice to guarantee your settings always load.
Step 4: Verify It Works
- Add this line to the end of your autoexec.cfg:echo "Autoexec Loaded Successfully!"
- Launch CS2 and open the console (~ key).
- Look for the message "Autoexec Loaded Successfully!". If it appears, your autoexec is working perfectly!
Before you can use commands or reload your autoexec in-game, make sure the developer console is enabled. To do this, go to CS2’s settings, find the “Game” or “Interface” tab, and turn on the developer console. This will allow you to open the console with the ~ key and enter commands whenever you want.
Using and Managing Your Autoexec in CS2
Your autoexec runs silently in the background at launch, but here are essential tips for interacting with it:
Reload Mid-Session
If you update your autoexec.cfg while CS2 is running, simply type exec autoexec into the console and hit Enter. This reloads the file without restarting the game.
Troubleshooting
- File Extension IssuesEnsure the file isn’t mistakenly named autoexec.cfg.txt. Enable "File name extensions" in Windows Explorer to confirm. Also, double-check that your file isn’t accidentally saved as autoexec.cfg.txt. Windows sometimes hides file extensions by default, so it’s easy to miss. To avoid this, enable “File name extensions” in Windows Explorer’s View menu. This way, you’ll be sure your file has the correct .cfg extension.
- Correct Folder LocationVerify the file is in Steam\steamapps\common\Counter-Strike Global Offensive\game\csgo\cfg.
- Launch Option MisconfigurationDouble-check that you added +exec autoexec.cfg in your Steam Launch Options.
- Final CommandAdd this as the last line in your autoexec:host_writeconfigThis saves all settings to the main config file upon game shutdown.
Organization & Backups
- Use Comments: Divide the file into sections (e.g., // CROSSHAIR SETTINGS).
- Backups: Store your autoexec.cfg in cloud storage (e.g., Google Drive) or on a USB drive.
Multiple Configs
Create additional .cfg files for specific setups. For example, practice.cfg for experimenting with settings. Load them anytime via the console:
exec practice.cfg
Essential Autoexec Commands for Competitive Play
1. Streamlined Grenade Selection
Bind specific grenades to keys for instant access:
2. Perfect Jump-Throw Bind
Add this section for consistent smokes and molotov throws:
alias "+jumpthrow" "+jump;-attack"
alias "-jumpthrow" "-jump"
bind "KEY" "+jumpthrow" // Replace "KEY" with your preferred key, like "n", "v", or "t"
3. Precision Crosshair Setup
Personalize your crosshair:
cl_crosshairstyle 4 cl_crosshaircolor 4 // Cyancl_crosshairdot 1 cl_crosshairgap -1 cl_crosshairsize 2 cl_crosshairthickness 0 cl_crosshair_drawoutline 0cl_crosshair_t 0
4. Performance & Network Optimization
Squeeze out FPS and reduce latency:
fps_max 0 cl_disable_ragdolls 1 mat_queue_mode 2 rate 128000 cl_cmdrate 128 cl_updaterate 128 cl_interp_ratio 1 cl_interp 0
5. Clean Viewmodel & Radar
Optimize screen space:
viewmodel_fov 68 viewmodel_offset_x 1.0 viewmodel_offset_y 2.0 viewmodel_offset_z -2.0 cl_radar_scale 0.35 cl_radar_always_centered 0cl_hud_radar_scale 1.3
6. Audio & HUD Clarity
Reduce distractions for better focus:
snd_mvp_volume 0 snd_menumusic_volume 0 hud_scaling 0.85 cl_draw_only_deathnotices 1 cl_showloadout 1
Conclusion: Your Path to Consistent Peak Performance
When you learn the art of autoexec.cfg file, your entire CS2 experience changes into that of consistent performance. Automating your setup will save you time and frustration by not having to waste time before matches, and give you an advantage. Start simple. First, combine your sensitivity, crosshair, and key binds.
Then include performance changes, grenade bindings, and radar adjustments as you need. It is imperative to back up your autoexec on a regular basis, more so after updates. Your autoexec is not just a text file: it is your silent friend who makes sure that your playstyle will remain the same no matter how far you go. Now launch the game, confident that your settings are locked in, and focus on the fight ahead.
Diposting pada di CS2