CS2 Replay Controls: A Comprehensive Guide to Watching and Analyzing Gameplay

Опубликовано в CS2
Counter-Strike 2’s replay system is a powerful tool for players, coaches, and content creators seeking to dissect matches with precision. Whether you’re reviewing your own performance, creating highlight reels, or studying strategies, understanding the intricacies of CS2’s replay controls is essential. This article walks you through the core mechanics of accessing, navigating, and leveraging replays, with a focus on practical controls and troubleshooting tips to streamline your experience.
Getting Started: Accessing and Loading Replays
Before exploring the controls, it’s important to understand how to access replays in CS2. Players can record their own matches by opening the developer console and using the command record [filename] during gameplay, which saves a demo file of the match. Official match replays can also be downloaded from the in-game match history or via the Steam Community’s match history page, where you can obtain .dem files for offline viewing.
Demo files are typically stored in your CS2 installation directory, often under folders like “csgo” or “maps,” but the exact location can vary depending on your setup. Once you have a demo file, launch CS2, open the console, and type playdemo [filename] to load the replay.
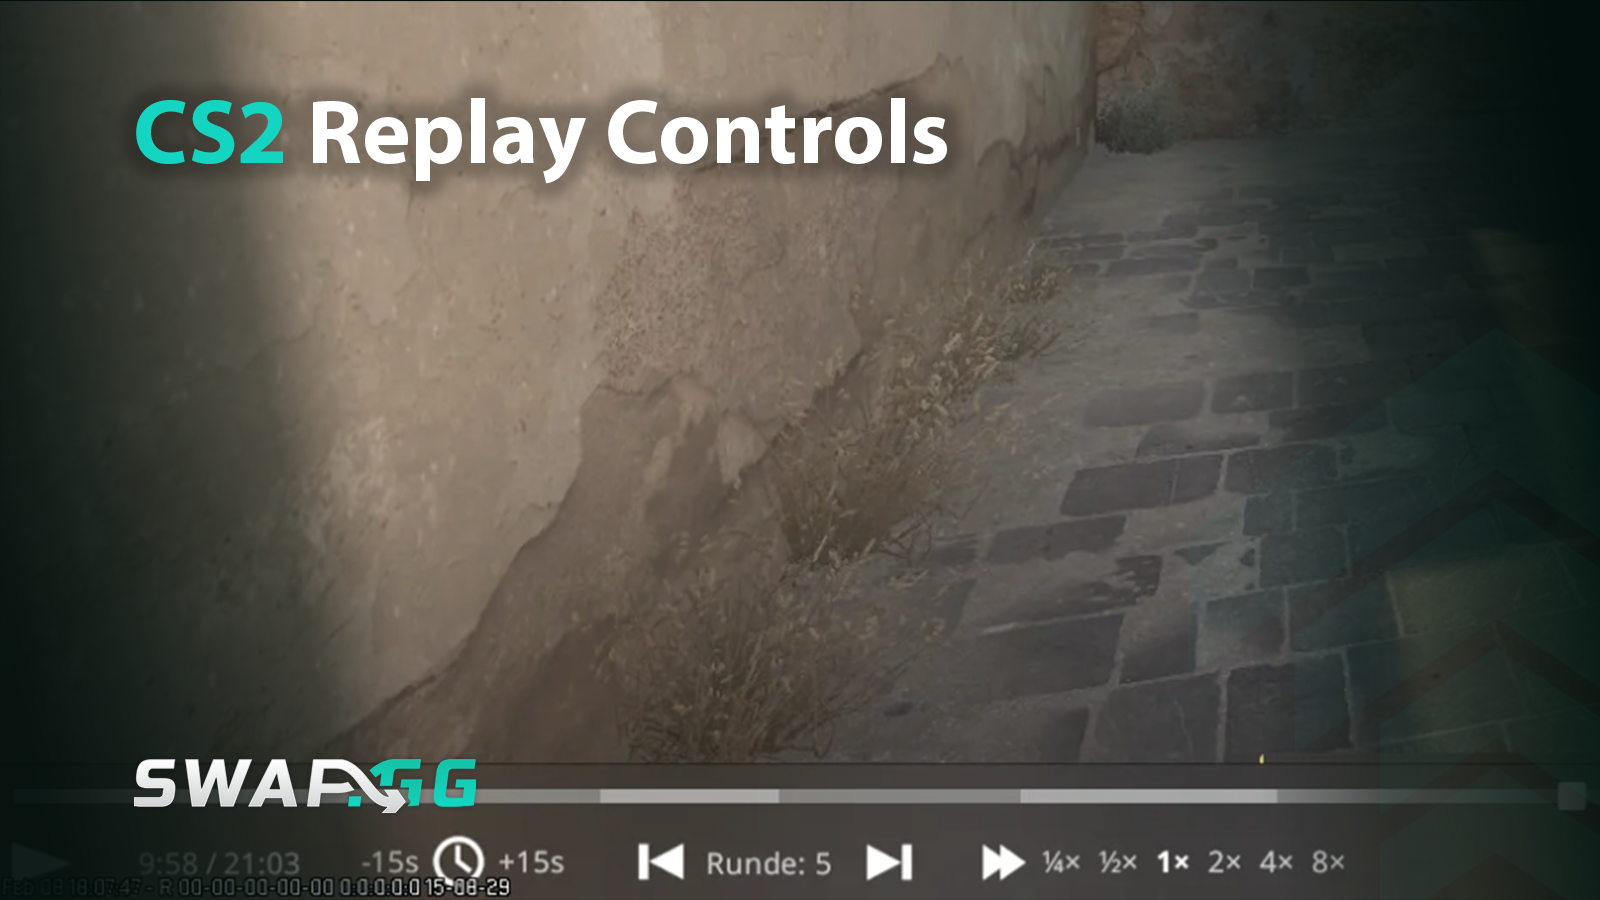
Navigating the Replay Interface
After loading a demo, the replay interface can be accessed by pressing Shift+F2 or by entering the demoui command in the console. This opens the built-in Demo UI, which features:
- A timeline (scrub bar) for navigating through the match.
- Playback speed controls.
- Round switching.
- Play/pause options.
You can use your mouse or keyboard shortcuts to control playback:
- Spacebar: Pauses and resumes the replay.
- Number Keys (1, 2, 3, etc.): Adjust playback speed, with 1 as normal speed and higher numbers increasing the speed.
- Q: Activates the free camera, allowing you to move around the map for different viewing angles.
The Demo UI does not include a dedicated kill feed panel or player list as a standard component, but it provides robust tools for reviewing and analyzing gameplay.
Core Playback Controls: Mastering the Basics
At the heart of replay functionality are the fundamental controls that dictate how you interact with the footage. These tools allow for both comprehensive analysis and streamlined navigation during demo playback.
Basic Playback Controls
- Play/Pause:Use the commands demo_pause and demo_resume in the console or the play button in the Demo UI to toggle playback. This is ideal for frame-by-frame analysis.
- Fast-Forwarding:Adjust playback speed using demo_timescale [value] (e.g., demo_timescale 2 for 2x speed) or the preset speed buttons in the Demo UI (ranges from 0.25x to 4x).
- Rewinding:Rewinding is achieved by jumping to specific ticks using the command demo_gototick <tick>. For instance:
- demo_gototick -200 moves back approximately 3 seconds in a 64-tick demo.
- Playback Speed Adjustment:Fine-tune playback speed using the slider in the Demo UI or via the command demo_timescale. This is particularly useful for analyzing critical moments such as grenade trajectories.
Camera Modes
- First-Person View:Spectate individual players to view gameplay as they experienced it.
- Free-Look Mode:Activate free-look mode via the Demo UI’s free-camera button to explore the map without restrictions. This mode is perfect for analyzing positioning, map control, or utility usage.
- Spectator Follow Mode:Locks the camera onto a specific player for movement analysis.
- Player Switching: Typically bound to number keys (default 5–7 in CS:GO/CS2). However, bindings can vary between setups and are adjustable via the console.
Advanced Navigation
- Round-Skipping:Use the round arrows in the Demo UI to quickly jump between rounds.
- Tick-Based Positioning:For precise navigation, use the demo_gototick [tick] command. Input the tick number to jump directly to a specific moment in the demo.
For deeper analysis, CS2 offers advanced camera tools. Locking the camera to specific actions—like a bomb plant or defusal—ensures you never miss critical moments. Slow-motion analysis, activated via demo_timescale 0.5, is invaluable for studying aiming techniques or weapon recoil patterns.
Bonus Tips for Efficiency
- Organize replays by naming them with dates or opponents (e.g., Mirage_vs_TeamX_20250502.dem).
- Combine demo_gototick with demo_timescale for frame-perfect analysis of clutch situations.
CS2 Demo Commands
Conclusion
Mastering CS2’s replay controls transforms how you engage with the game. Whether you’re a competitive player refining strategies or a content creator crafting cinematic clips, these tools offer unparalleled insight. By leveraging camera customization, playback mechanics, and interface shortcuts, you’ll unlock new layers of analysis and gain a competitive edge. Remember, practice and experimentation are key to unlocking the full potential of CS2’s replay system.
Опубликовано в CS2